Mary Had a Little Lamb…But I Think I Ate it in My Irish Lamb Stew

Bowl of Irish Lamb Stew

I went to a butcher shop for the first time to buy some lamb for this stew. It was great. I felt like I was in a Dickens novel, visiting Mr. Hackbottom, the butcher, for some mutton, then Mrs. Frickelby for some currants to put in my mincemeat. I’ve never thought of raw meat as looking healthy, at least not before setting foot in the butcher’s shop. Everything was so pink and glistening and fresh-looking. I circled around the circumference of the store with my mouth hanging open in awe, like an orphaned street urchin setting foot in a candy store for the first time, nickel in hand. I only made it halfway around and was staring eye to eye with a giant shrimp when someone came over and asked if he could help me. I asked for lamb, expecting them to only maybe have some kind of filet. He walked me over, explaining that they have lamb loins, ground lamb, lamb for stew, lamb shoulder, and a lamb leg the length of my arm. I’m pretty sure you have to have a special platinum chef’s card saying, “I know what this is! I know how to cook it!” before they will let you buy a lamb leg. I had never cooked with lamb before, and since I was making a stew, I went with the lamb for stew. Safe bet, plus it was already cut up into nice little chunks. Score.

Fresh Lamb Meat

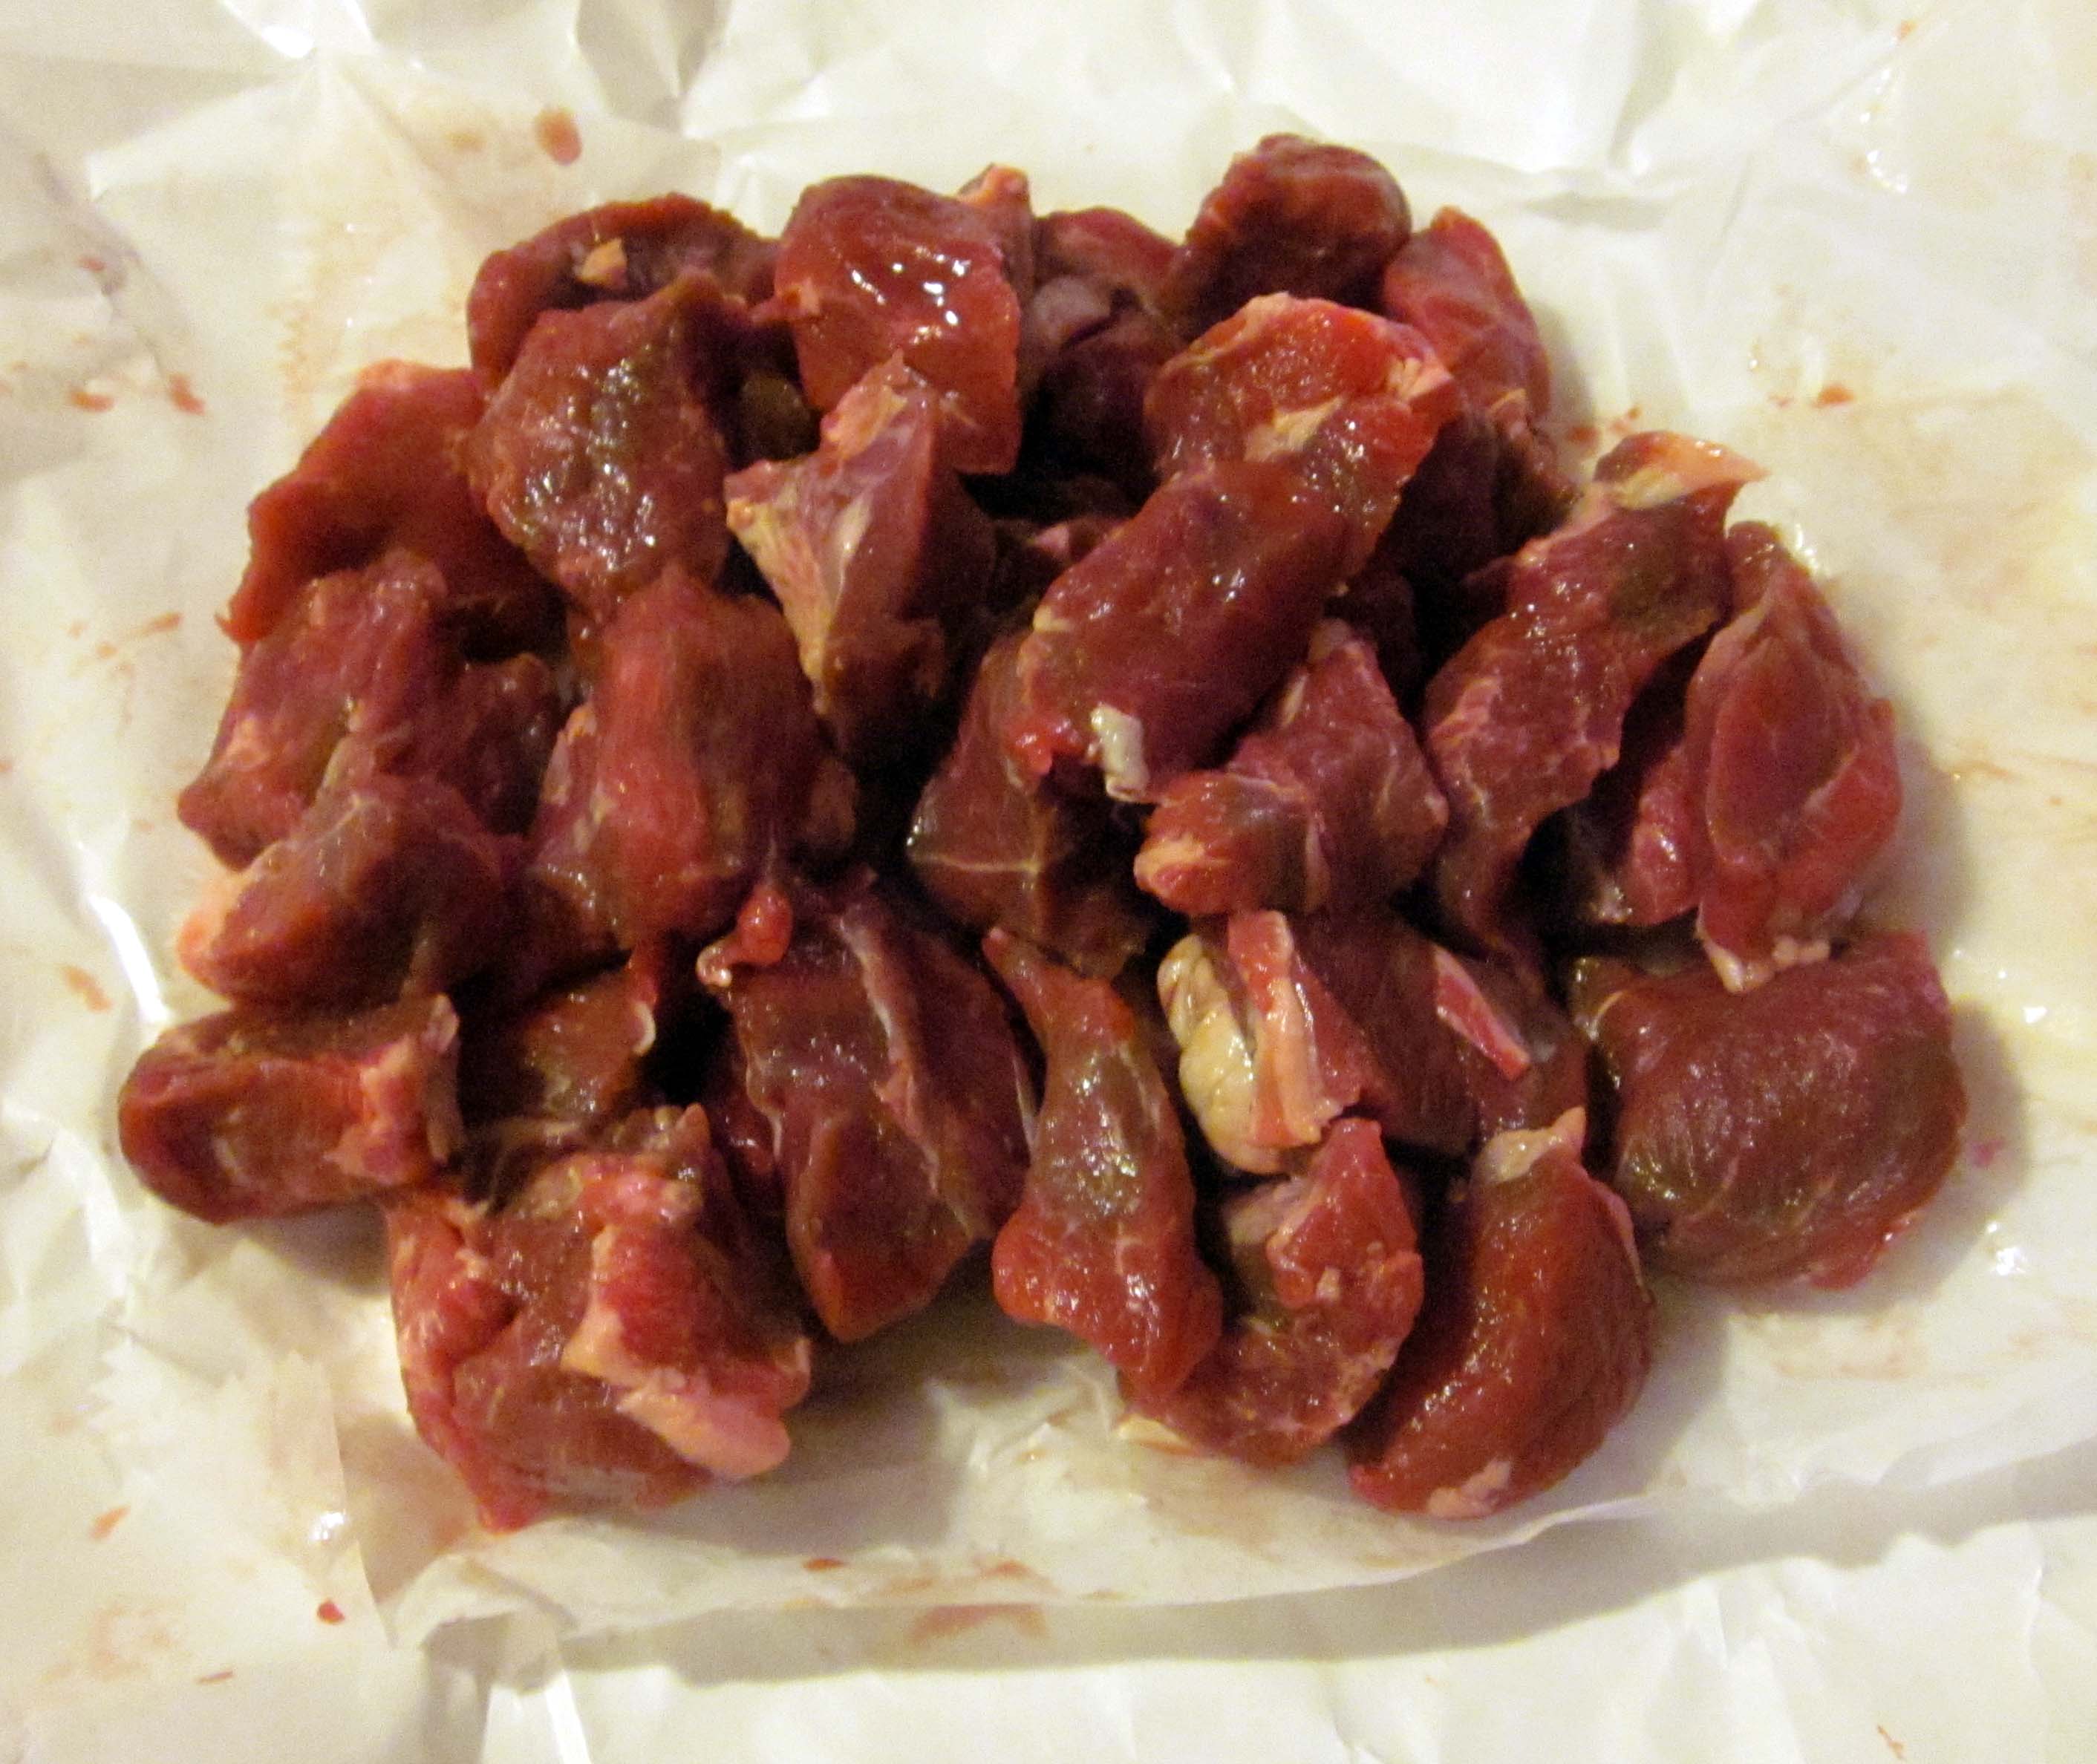
Fresh chunks of lamb for my stew. It’s so pink and fresh!

I’ve only eaten lamb a couple of times and I’d never made a stew before, so this whole experience sort of felt like walking out on a thin branch above a lake full of alligators. I re-read the recipe at least a dozen times, afraid of missing something important. It seemed too simple for something like lamb. Actually, it was that simple. Sweat the onions, brown the lamb, add the herbs, carrots, and chicken stock, then wait. And wait. Add potatoes. And wait.

Browning Lamb Meat with Onions

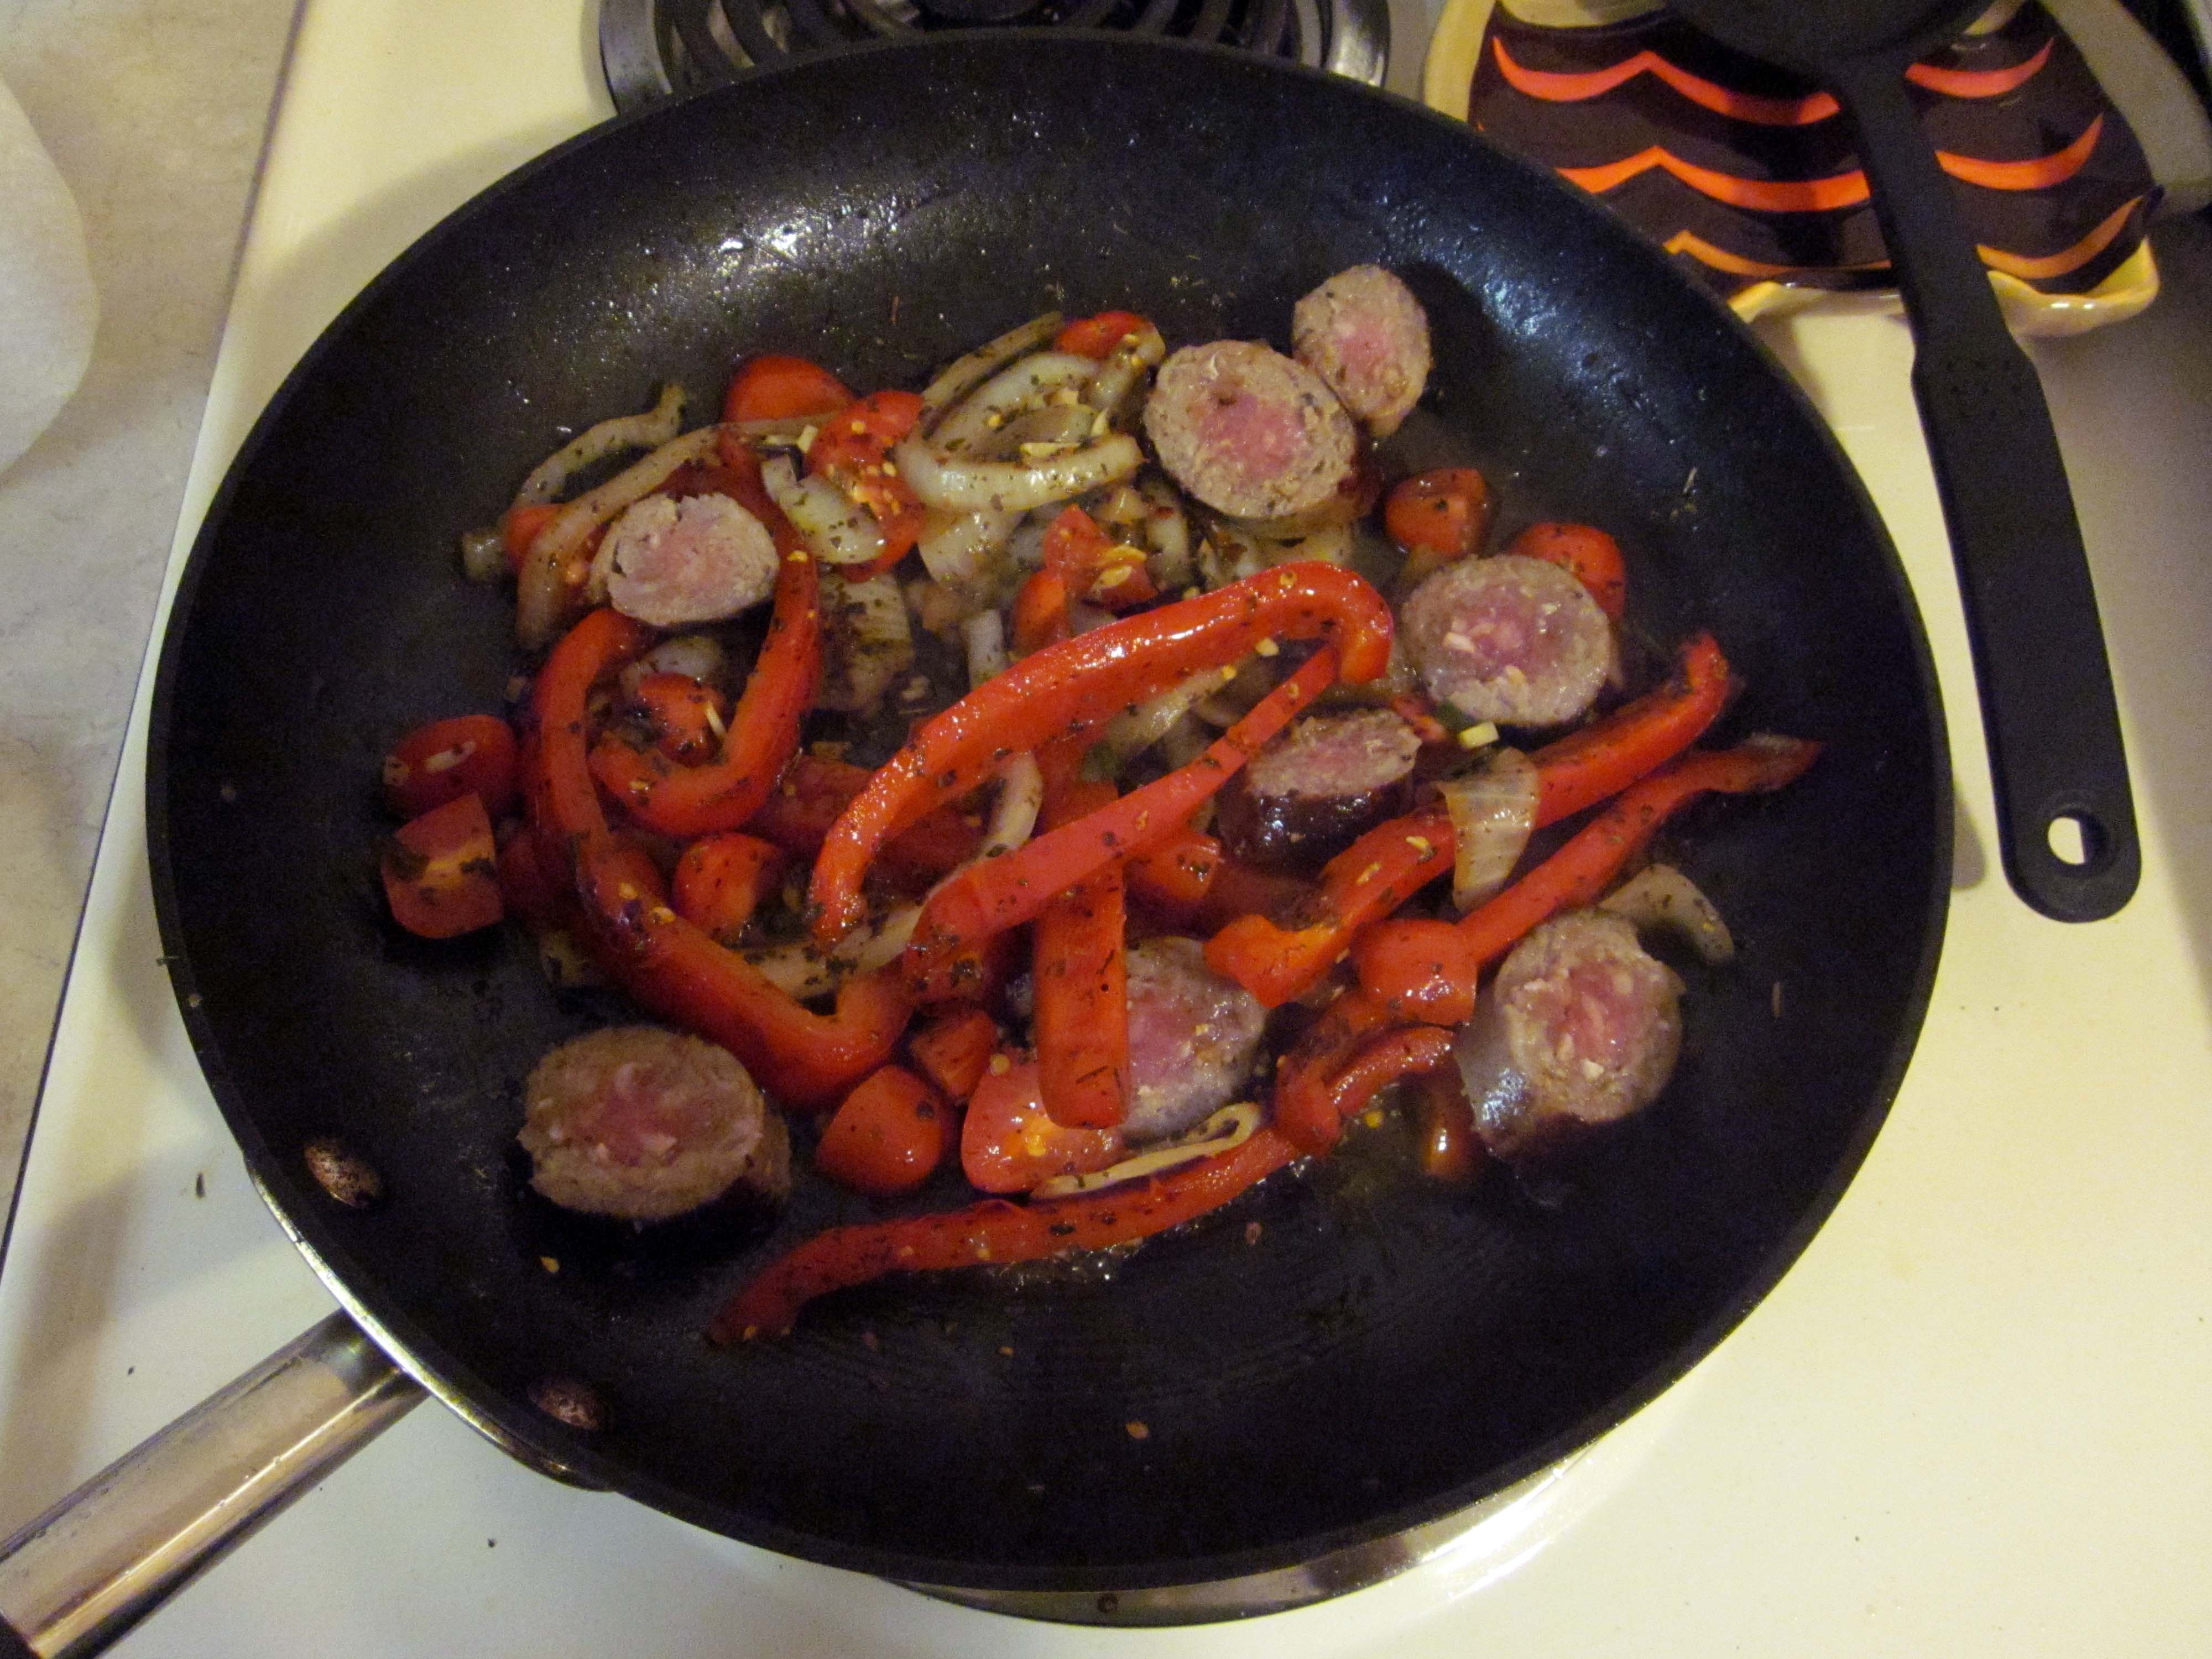
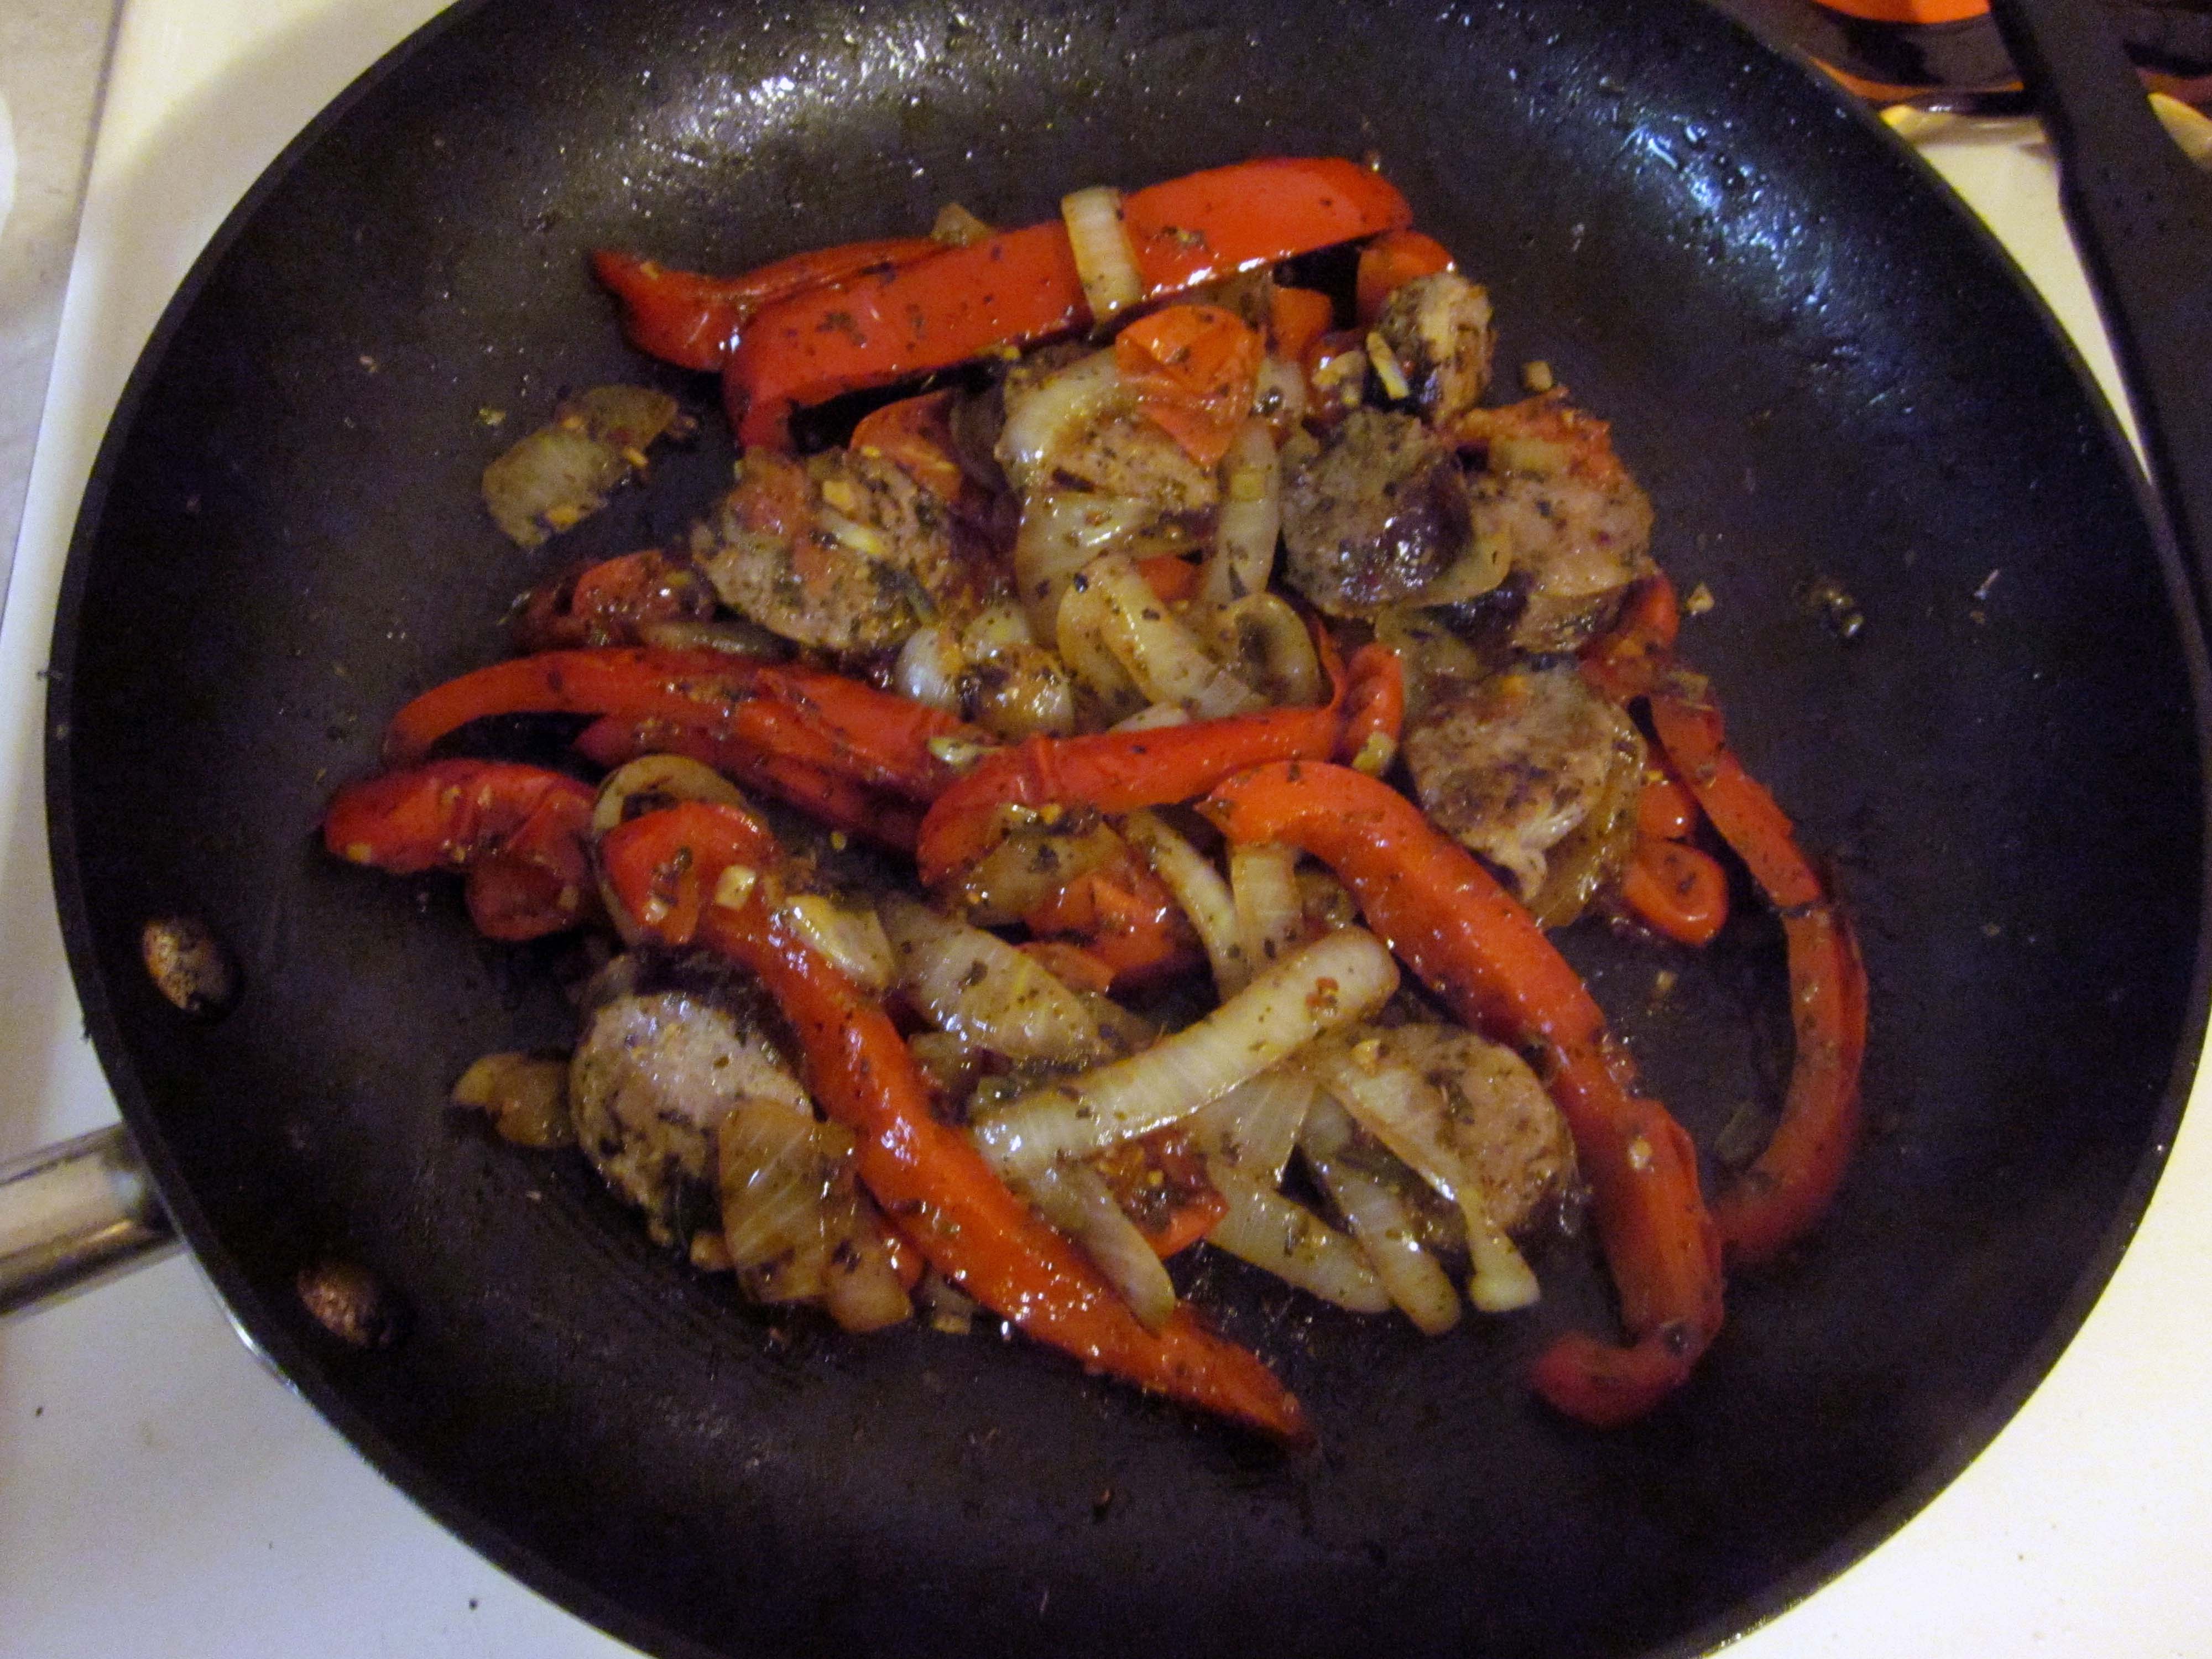
Browning the lamb chunks with butter, olive oil, thyme, and onions.

Bouquet Garni of Parsley, Thyme, and Bay Leaf

A bouquet garni of parsley, thyme, and a bay leaf to season the stew.

Irish Lamb Stew

Now, we wait.

I added the potatoes after 2 hours of cooking, and thought I’d test the meat to see if it was cooked. I tried to pull a very small bite off a piece of lamb, but to my surprise, it was tough, resembled leather, and was impossible to separate from the rest of the meat. I was downtrodden and discouraged, thinking this was going to end up being the worst thing I’d ever cooked. Still, I waited.

Adding Potatoes to the Irish Lamb Stew

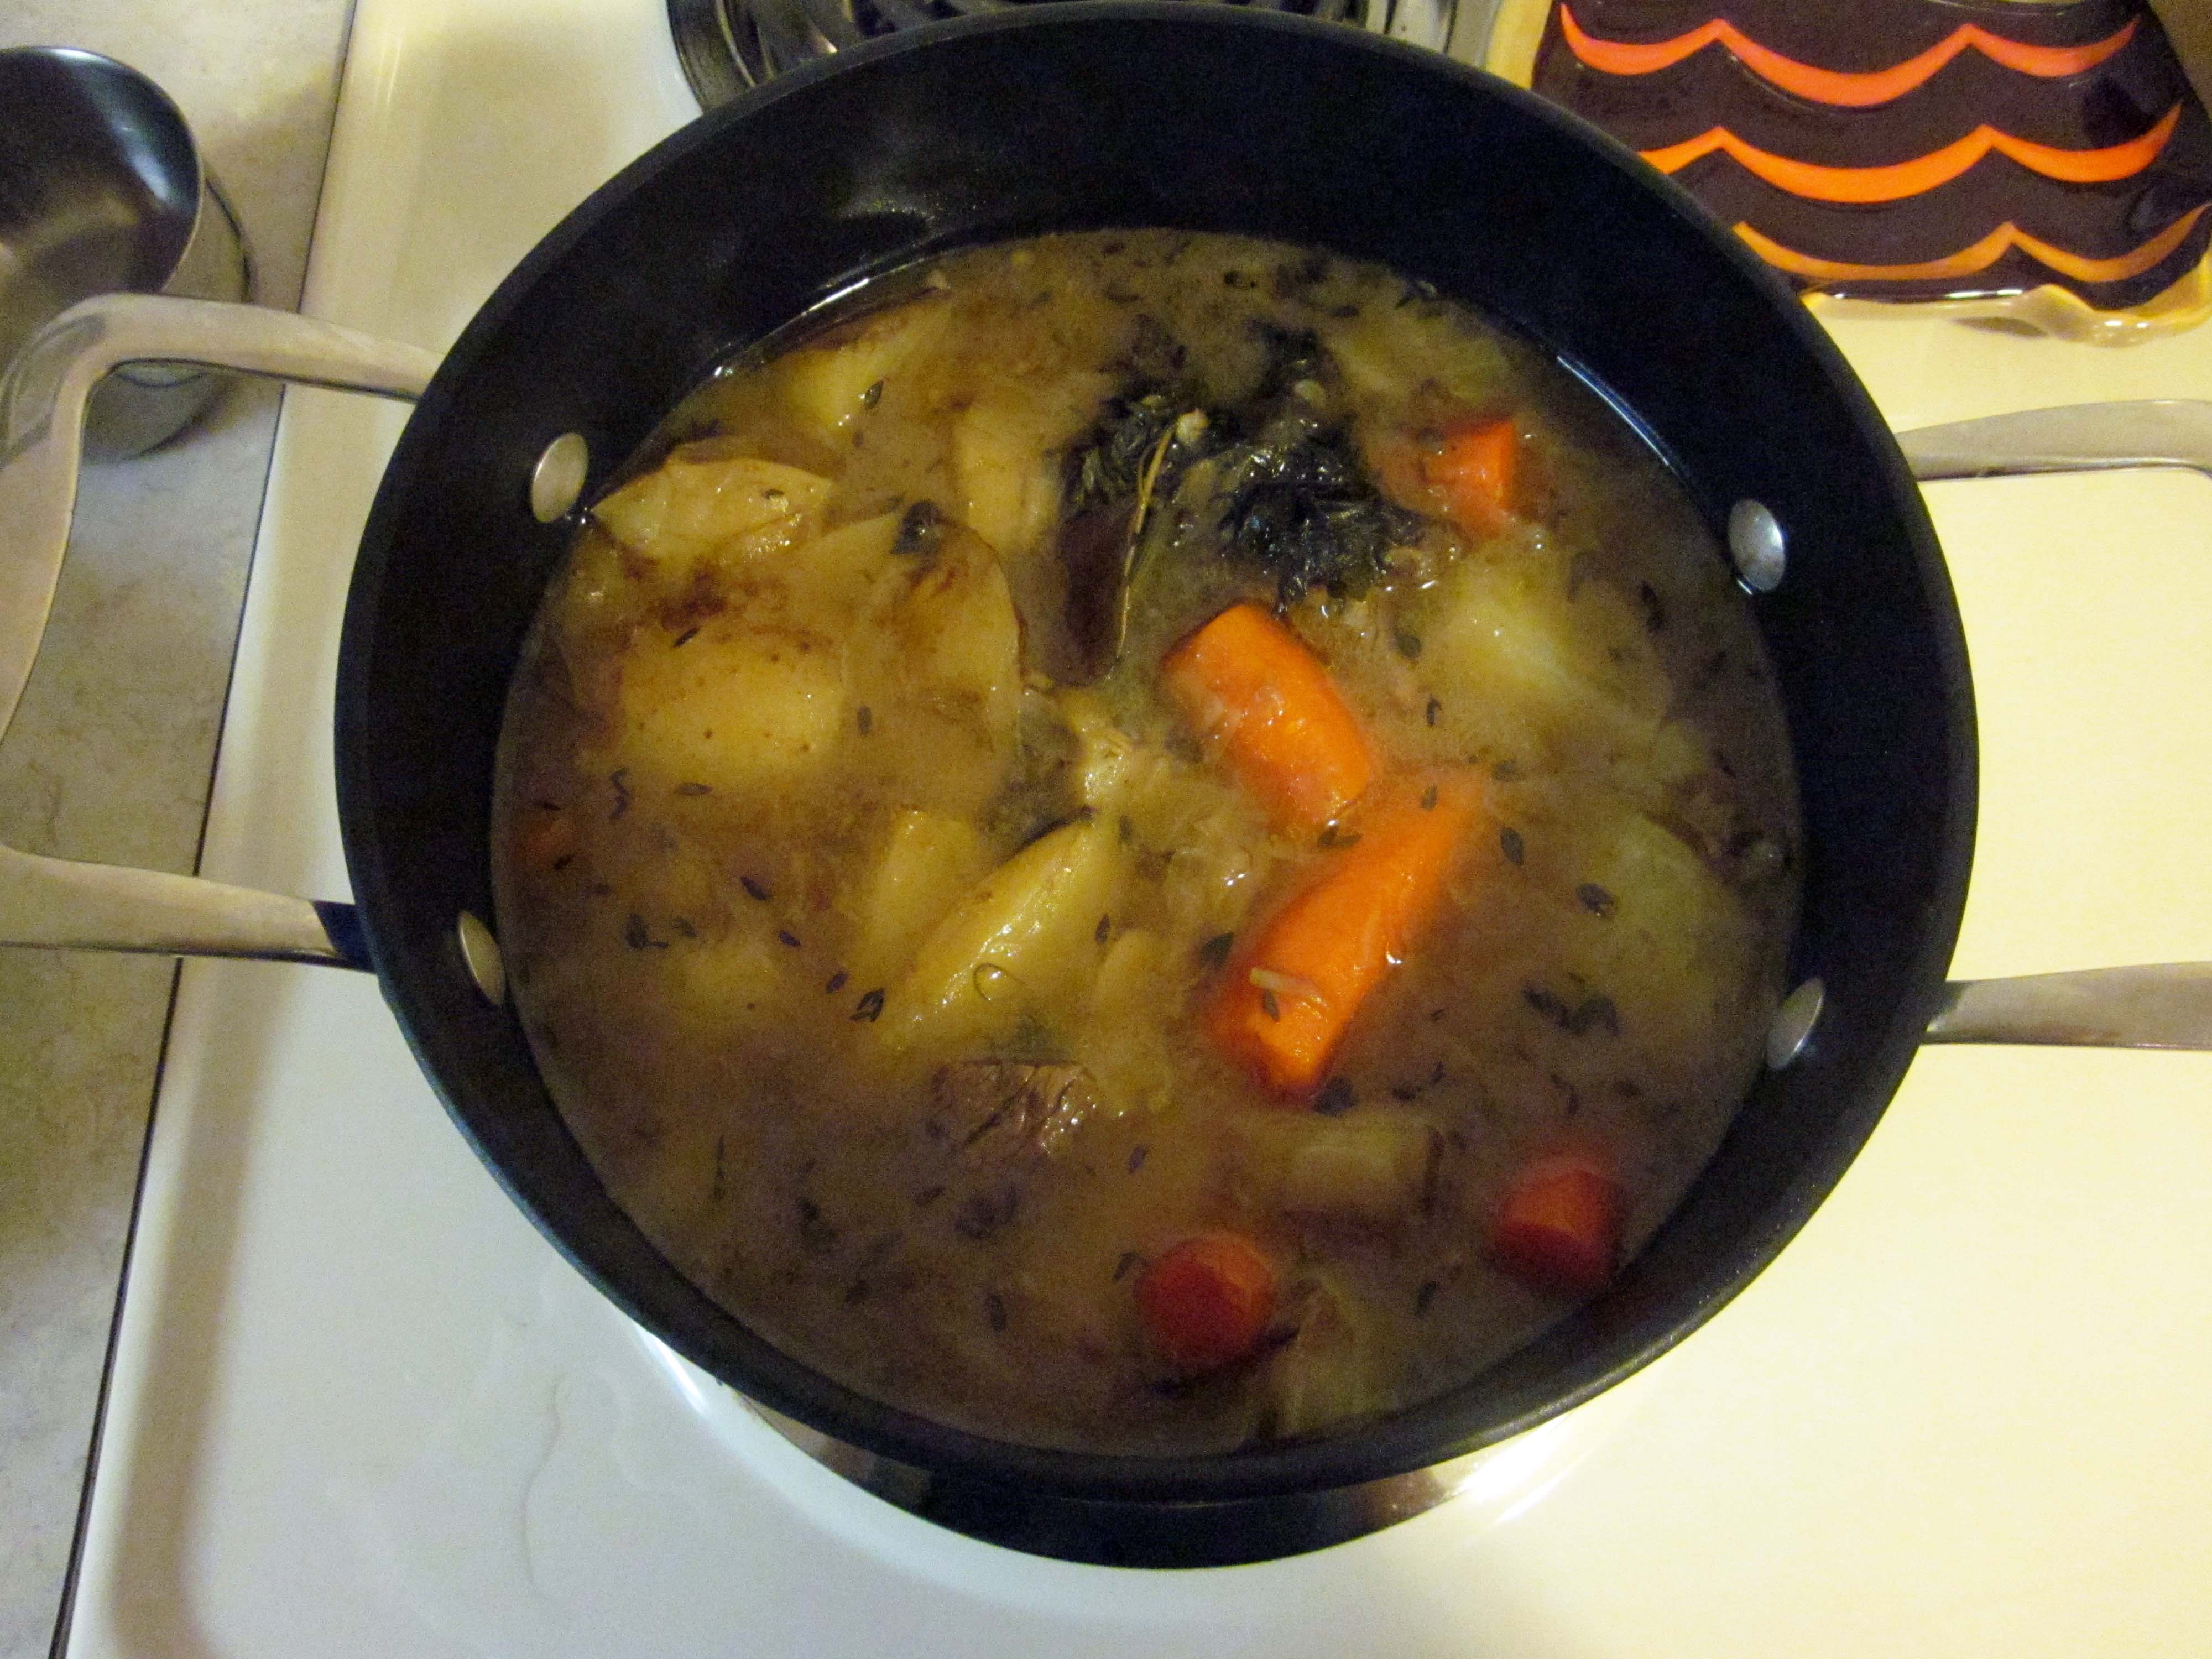
Adding potatoes…and waiting.

I had the stove on the lowest setting, and the pot didn’t seem very warm, so after adding the potatoes, I turned the heat up a little and decided to let it cook another hour instead of just 30 minutes, hoping that would make the meat more tender. An hour later, I was busy doing other things and decided to just let the pot keep cooking until I was ready to eat. It ended up cooking a little over 4 hours in total. I think this was a smart move, because when I finally did eat the stew, the meat was so much more tender than it had been 2 hours earlier. It easily broke apart with a spoon and lost all the toughness it previously displayed. I guess time really does heal all wounds.

Irish Lamb Stew

It’s finished! And it smells amazing.

This stew has a really wonderful flavor and the thyme is definitely prominent in all the best ways. The broth is so flavorful that I enjoy just sipping it straight out of the bowl by itself. The carrots and potatoes are delicious, but I’m just glad that the meat lost its toughness and took on the taste of the broth. Adding fresh chives just before serving may seem insignificant, but I really think it’s a must. It complemented everything else in the stew so well and added a tiny bit of crispness and fresh color to the dish. The best part of the whole process: the smell. From the moment I seared the meat and added the chicken stock, it smelled incredible. Being able to smell the stew cooking all day long made the long wait tolerable, and ultimately worthwhile. I’ve never been big on cooking or eating soups, but after this experience, I might just try my hand at soups more often.

Bowl of Irish Lamb Stew

Topping the stew with fresh chives is a great idea. Delicious!

Irish Lamb Stew

It says this serves 6 people, but those must be 6 huge servings. I cut this recipe in half, and half the recipe looks like 6 servings to me.

Ingredients

  • 2 medium-sized onions, chopped
  • Oil, for frying (I used 1 tablespoon)
  • 1-ounce butter
  • 1 sprig dried thyme (I used fresh thyme instead)
  • 2 1/2 pounds best end of lamb neck, cut into large pieces
  • 7 carrots, chopped lengthways into 2-inch pieces
  • 2 tablespoons pearl barley
  • 5 cups chicken stock, recipe follows
  • Salt
  • Freshly ground black pepper
  • 1 bouquet garni (parsley, thyme, and bay leaf)
  • 12 medium potatoes
  • 1 bunch parsley, leaves finely chopped
  • 1 bunch chives

Directions

In a large heavy-bottomed saucepan, cook the onions in oil and butter, on medium-high heat until they are translucent. Add the dried thyme and stir. Add the lamb and brown on a high heat to seal in juices. Add carrots, and pearl barley. Pour in the chicken stock so that it almost covers the meat and vegetables. Season with salt and pepper, and add Bouquet garni. Cover and cook on low heat for 2 hours, being careful not to boil. Place potatoes on top of the stew, cover and cook for 30 minutes until the meat is falling beautifully off the bones and the potatoes are fork tender.

Serve the stew in large flat soup bowls, and drizzle herb butter over the potatoes or garnish with parsley and chives.

Italian-Style Pork and Chicken Brats, or How to Improvise When You Don’t Feel Like Going to the Grocery Store

This past weekend, I was having a lazy Sunday. Not the kind where you buy cupcakes and go see The Chronicles of Narnia (seven years later that video still cracks me up), but the kind where you look out the window and think, “Meh. I think I’ll stay in today.” This was fine until I realized I was missing a key ingredient in a recipe I wanted to make, and I really didn’t want to go to the grocery store. Solution: make something up and hope it’s edible!

I really don’t like bratwurst. To cut a long story short, a while ago I bought a package of 5 Johnsonville Pork & Chicken Bratwurst because I had a coupon making them ridiculously cheap. I ate two – one like a traditional bratwurst and the other cut up and sauteed with peppers, onions, barbecue sauce, and cheese. Neither was very good. I almost threw them away, but at the last minute decided to freeze them instead in case I ever got desperate for something quick to eat. Desperate times call for desperate measures. Like eating bratwurst.

Because of these past experiences, I wasn’t expecting much from these brats, but decided to try to find a different way to cook them so that they would be more palatable. I found a recipe by Giada de Laurentis where she cooks turkey sausage with peppers, onions, tomatoes, and a variety of spices. She says that it’s street food in Italy and is often put on sandwiches. I had most of the ingredients in my kitchen, so I thought I’d try it out. It couldn’t be worse than the dishes I’d previously made with the brats.

Chicken and Pork Bratwurst Cooking with Onions, Peppers, and Tomatoes

Now it’s raw…

Pork and Chicken Sausage with Peppers, Onions, and Tomatoes

…and a few minutes later it’s not. Cooking is like magic, only tastier.

Perhaps my opinion is skewed because my expectations were so low to begin with, but I was shocked by how tasty (borderline delicious) this dish turned out. It didn’t look that appetizing to me on the plate, but I guess you can’t judge a book by its cover. Unless it has a vampire on its cover, then you can judge it. Seriously though, I don’t think there is a better way to cook these sausages, and it’s probably the only way I’ll eat the remaining two.

You can find Giada’s recipe at the Food Network site. Here is how I cooked them.

Ingredients

  • 1 tablespoon extra-virgin olive oil
  • 1 Johnsonville Pork & Chicken Traditional Bratwurst (any kind of sausage would work)
  • 1/2 red bell pepper, sliced
  • 1/2 yellow onion, sliced
  • Pinch of salt
  • 1/4 teaspoon freshly ground black pepper
  • 1/8 teaspoon dried oregano (I just shook the bottle a couple of times)
  • 1/2 tablespoon dried basil
  • 1 garlic clove, chopped
  • 2 tablespoons cooking sherry (Giada uses Marsala wine, but since I didn’t have any, I used cooking sherry mixed with dry vermouth to cut down on the saltiness of the cooking sherry.)
  • 2 tablespoons dry vermouth
  • 8 grape tomatoes, quartered (She uses canned diced tomatoes, but I didn’t think it was worth opening a can for 1/4 cup, so I just used a few fresh tomatoes)
  • Red pepper flakes, optional (of course I loaded up on these)

Directions

Heat the oil in a heavy large skillet over medium heat. Add the sausages and cook until brown on both sides, about 7 to 10 minutes. Remove from the pan and drain.

Keeping the pan over medium heat, add the peppers, onions, salt, and pepper and cook until golden brown, about 5 minutes. Add the oregano, basil, and garlic and cook 2 more minutes.

Add the cooking sherry, dry vermouth, tomatoes, and chili flakes, if using. Stir to combine, scraping the bottom of the pan with a wooden spoon to release all the browned bits. Bring to a simmer.

Cut the sausages into 4 to 6 pieces each, about 1-inch cubes. Add the sausage back to the pan and stir to combine. Cook until the sauce has thickened, about 20 minutes. (Mine cooked in about 8 minutes, but I made much smaller portions than the original recipe suggests.)

Serve in bowls. Or, if serving as a sandwich, split the rolls in half lengthwise. Hollow out the bread from the bottom side of each roll, being careful not to puncture the crust. Fill the bottom half of the roll with sausage mixture. Top and serve sandwiches immediately.

I just ate this by itself, but this mixture would be great with bread, pasta, or rice.

Pork and Chicken Sausage with Peppers, Onions, Tomatoes, and Basil

This didn’t look very appetizing to me and I wasn’t looking forward to taking a bite. That’s why I was so surprised when it I actually really liked it!

Overall, the dish was surprisingly sweet. I’m not sure what caused this; it could have been all the basil, the fresh tomatoes, or the mixture of cooking sherry and dry vermouth. Either way, the peppers were sauteed perfectly so that they were incredibly sweet and their skin was beginning to fall off. The onions were lightly caramelized, adding to that flavor. It looks like a lot of basil, but it really is necessary and doesn’t taste overwhelming. The crispy edges of the sliced sausage improved its taste tenfold, and the sausage soaked up the wine sauce, oregano, and basil to the point of making me forget how much I disliked it the first time I ate it.

This meal was definitely a pleasant surprise. I had just planned on throwing something together quickly, figuring it wouldn’t be worth a blog post, but this turned out to be so good that I had to share it.

Let’s be honest. This still doesn’t turn me into a bratwurst fan. But if you’re ever in a situation where you’re forced to eat a bratwurst or walk the plank, choose to eat the bratwurst this way. It’s better than the sharks.

Vegetarian Chili

All of this has to fit in the slow cooker.

All of this has to fit in the slow cooker.

I used to be a vegetarian. Twice. The first time was in high school. I think it was a mild form of rebellion, growing up in a meat and potatoes area where missing school or work because it’s deer hunting season is a perfectly legitimate excuse. The second time was my first year of college. That was mostly because the dining hall meat freaked me out. What I’m getting at is that I can appreciate a good vegetarian meal. I have my own recipe for vegetarian chili which mostly involves dumping anything that looks like it could belong in chili in a pot and cooking it with beans and tomatoes. This is surprisingly tasty. Since I’m all about trying new things and this seemed really easy, I thought I would try this recipe for Vegetarian Chili from the Food Network website.

This recipe is so simple to make; the only thing you have to chop is an onion, pepper, pickled jalapenos and some garlic. The rest is just opening cans and putting their contents in a slow cooker. I just realized I haven’t used my slow cooker since April 2012 when I made some pulled pork, and I don’t know why I ignored it for so long because it’s so easy to use. There isn’t much better than being gone all day, unlocking the door, and being greeted by the aroma of dinner, just waiting for you to eat. Unless the power goes out mid-way through the cooking cycle and you end up with lukewarm chicken (this happened to me once). If all goes as planned, my crock pot and I are about to get a lot closer in the coming weeks.

Lucky for me, chili allows for lots of substitutions. The recipe uses four kinds of beans: black, cannellini, red kidney, and lima beans. When I reached into the cupboard to get my can of black beans, I realized that the expiration date said August 2012. I decided not to risk it, botulism and all. “No problem,” I thought. “I’ll just use these pinto beans instead.” Turns out the pinto beans also expired in August 2012. I guess it’s been longer since I’ve cooked than I thought. Scouring the cabinets for anything resembling beans, I found that my only options were chickpeas or lentils. Lentils make good soup, so I used about 1/2-2/3 a cup of those instead. I also love lots of spice in my food, so I tossed in some chipotle chili powder, cayenne pepper, and a little extra hot sauce.

In the morning

In the morning

8 hours later

8 hours later

The end product was very tasty, but not unique or mind-blowing. It probably ranks somewhere in the middle compared to all the chili I’ve ever eaten. Any less spice and it would’ve been too bland, but that can be adjusted based on individual taste. It also had a very liquid consistency, but this is a minor grievance since the liquid can just be ladled out.  Instead of topping the chili with cheese like the recipe suggests, I ate mine with sour cream and cilantro.

On the plus side, this is a very healthy dish. The recipe makes about 11 cups, and each cup only contains 157 calories, 0g fat, 32g carbohydrates, 9g protein, and 9g fiber. I also made a pan of cornbread to go with the chili, which was a nice combination for a snowy evening.

Bowl of Vegetarian Chili

Vegetarian Chili

Ingredients

  • 1 (28-ounce) can diced tomatoes
  • 4 cups reduced-sodium vegetable broth
  • 1 (15-ounce) can black beans, rinsed and drained
  • 1 (15-ounce) can white (cannellini) beans, rinsed and drained
  • 1 (15-ounce) can red kidney beans, rinsed and drained
  • 1 cup frozen baby lima beans or regular lima beans
  • 1 cup chopped onion
  • 1 green bell pepper, seeded and chopped
  • 2 cloves garlic, minced
  • 1 tablespoon minced pickled jalapeno (from can or jar)
  • 2 tablespoons chili powder
  • 2 tablespoons dried Mexican oregano or regular oregano
  • 2 teaspoons ground cumin
  • 1 teaspoon ground coriander
  • 1 to 2 teaspoons hot sauce
  • 1/3 cup couscous
  • 1/2 cup shredded Monterey jack cheese
  • 1/3 cup chopped fresh cilantro leaves
  • Salt and freshly ground black pepper

Directions

In a slow cooker, combine all ingredients but the couscous, shredded cheese, cilantro and salt and pepper. Cover and cook on LOW for 6 to 8 hours or on HIGH for 3 to 4 hours.

Five to 10 minutes before serving (depending on temperature of slow cooker) add couscous, cover and cook, until couscous is tender. Season, to taste, with salt and black pepper.

Just before serving, top each serving with shredded cheese and cilantro.

The Tale of the Herb-Stuffed Salmon

Aquarium Fish

“Fish are friends not food.” Except when they’re food.

Salmon has long been one of my favorite standbys. The days when I was a teenager and refused to eat my mom’s grilled salmon because I thought it smelled terrible are unfathomable to me now. When I had access to a kitchen for the first time in my apartment in college, I remember once buying a whole frozen fillet about 14 inches long, and letting it sit in the freezer for a couple of months because I didn’t know what to do with it. When I finally got around to using it, it was frozen so solid I first tried to break the brick-like fish in half with my bare hands. I don’t know why I thought that would work. I then picked up whatever sharp or heavy object I could find within reach and started hacking away at it until a piece finally chipped off.  The result of that labor was a cold, mushy, flavorless mess. I finally learned that you actually need to put something on top of salmon to make it taste good, so I started drowning it in bottled marinade. A little better, but still pretty bad.I’m proud to say that I can now cook some pretty fierce salmon. My favorite go-to preparation in a pinch is to mix some honey and dijon mustard together, pour it on top of some salted and peppered salmon, then cover the sauce with minced onion and dill. When you bake it, the honey caramelizes and is quite scrumptious. I’m always looking for different ways to cook salmon because I get bored very easily. I like honey and I like soy sauce, so I thought I’d give this a try.

Mmmm, fresh herbs.

Mmmm, fresh herbs.

Another Food Network recipe, Honey Soy Grilled Salmon with Edamame uses a very basic sauce of honey, soy sauce, and lime juice for the glaze. The thing that makes it unique is that the salmon is stuffed with a mixture of fresh herbs. I used the required scallions, ginger, and cilantro and substituted sesame oil for vegetable oil, mostly because I have half a dozen flavored oils I rarely use, so I’m going to start taking advantage of them when I can. I’ve never stuffed salmon before and was a little intimidated at the thought, but it was very simple. Following the instructions, I cut slits halfway through the salmon on the skin side. I was so happy I didn’t cut all the way through the salmon like I thought I would. One thing they don’t tell you in the recipe is to watch for scales. They kept coming off, so I had to dig them out of the slits, then they got stuck all over my hands, so I had piles of scale-covered paper towels surrounding me. Okay, really it was just one paper towel, but it seemed more dramatic at the time.

Now will you grant me wishes?

Now will you grant me wishes?

After stuffing the fish, I put it back in the refrigerator while I did yoga for an hour. I don’t know if this did anything to the fish, but I’m going to pretend that it enhanced the flavor by infusing the herbs in the salmon, thus dispersing the magical properties of the cilantro and ginger that cause the fish to grant me wishes. I mean taste better. You don’t have to let it sit, I just wanted to do yoga before dinner. I broiled the fish because I don’t have a grill pan, and I kind of prefer it broiled anyway. The recipe says to serve it with edamame, so I boiled 1 cup of frozen edamame pods in 2 1/2 cups of salted water for five minutes. I really have no idea why the recipe includes edamame because it has nothing to do with the fish. It’s really just a side item and leaving it out wouldn’t make a difference. I’m not complaining though, it reminded me that I need to start eating more edamame. It’s delicious and has a crazy amount of protein and fiber packed in a small container.

Salmon with edamame and some leftover quinoa.

Salmon with edamame and some leftover quinoa.

Oftentimes when I eat something I’ve cooked, I can’t believe I made it. Something I cooked just shouldn’t taste that good. But it does. Taking a bite of this fish with your fork and discovering a pocket of herbs is like opening a present you’ve always wanted but never thought you’d get. It’s moist and juicy and the combination of the bitterness of the scallions corresponds well with the sweetness of the honey. It all melds together in your mouth like a whirlpool of warm spring goodness. If I have any criticism, it’s that the scallions might be a little overpowering if you’re not careful and take a big mouthful of them. Still, this dish provides a balanced mix of flavors, and seems well-suited for the oily texture of the salmon. A 6 ounce serving of the salmon contains 360 calories, 21g fat, 5g carbohydrates, and 35g protein.

Ingredients

  • 1/4 cup packed cilantro leaves
  • 2 scallions
  • 2 teaspoons vegetable oil
  • 1 teaspoon grated ginger
  • Kosher salt and freshly ground pepper
  • 4 center cut skin-on wild salmon fillets, about 6 ounces each
  • 2 teaspoons fresh lime juice
  • 2 teaspoons low-sodium soy sauce
  • 2 teaspoons honey
  • 1/4 teaspoon black sesame seeds
  • 1 1/3 cups cooked edamame
  • Lime wedges, optional garnish

Directions

Preheat the grill over medium-high direct heat. Oil the grill grates. Finely chop the cilantro and scallion and mix in the oil and ginger. Season with salt and pepper.

Cut two 3-inch long slits through the skin lengthwise on the bottom of the salmon fillets, going about halfway into the salmon. Evenly stuff the slits with the herb mixture. Season the fish with salt and pepper.

Stir together the lime juice, soy and honey until smooth. Place the salmon, skin side up, on the grill and cook until well marked, 3 to 4 minutes. Turn the salmon and continue to cook, brushing the tops with the sauce, until the fish is cooked through, about another 3 to 4 minutes. Transfer to a serving plate and sprinkle the tops with the sesame seeds. Serve with edamame and lime wedges.

Broiler directions: Position an oven rack so that a baking sheet set on the rack is about 4-inches below the heat source. Preheat the broiler. Prepare the salmon as above and place the fillets, skin down, on a foil lined baking sheet coated with cooking spray. Broil, basting 3 to 4 times with the sauce, until just cooked through, about 6 to 7 minutes.